Digital photography (for the photographically challenged)
And I’m one of them … (so count me in). Here’s a guide that will help us to help you see some of your photos in print.
If you don’t already have a digital camera, you won’t need to break the bank to get one. Any new digital camera in the $200 range will satisfy all the needs of an amateur photographer.

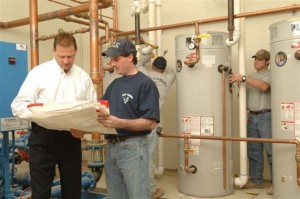
All the key elements are here: guys examining mechanical plans with technicians installing Bradford White eF water heaters. Lighting and depth-of-field are great, and it all looks pretty natural – as though the photographer isn’t there.
Be sure to spend the extra 20 bucks or so for a larger memory card. You may want to buy an extra one, too. With the extra storage, instead of taking one picture of any given situation or pose, you can snap three or four. Later, you can flip through the shots to remove those predictable sloppy-drunk-looking “mid-blink” photos.
Another reason for the larger memory card: they allow you to notch-up the resolution. We recommend that if you’re taking the time to make the photo – set the camera on its highest resolution. The “bigger” the picture, the better it’s going to turn out when you upload them to your computer and ultimately see them in a magazine; after all, that’s what we’re leading up to here.
The higher the resolution, the nicer, more detailed the images… and the more appealing to magazines.
The only downside is that, with higher resolution, you can’t fit as many pictures on the card. But, hey, if the “Memory Full” warning pops up, just press a button, pop the card, swap-in the reserve card and keep shooting.

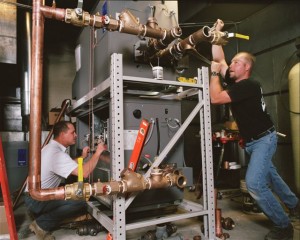
You’d be hard-pressed to find a more natural, action-packed boiler installation photo than this one. Our Laars article got some great coverage with these photos as fuel for the fire.
Do your best not to use the zoom function. Both digital and optical zooms present problems. Digital zoom wreaks havoc on picture quality, and in many situations optical zoom can limit the amount of light the camera takes in. Now, of course you can’t entirely eliminate the use of your camera’s zoom, but depending on the circumstance, you can limit it. It’s usually better to fill the screen by walking closer to the subject, not by zooming in on it. You can always crop pictures later.
Check your surroundings. Try to keep clutter out of the background as much as possible. In a mechanical room or jobsite, it may be a good idea to sweep the floor and use a wet rag to wipe those pipes n’ pumps. You wouldn’t want an audience of your peers to see a sloppy mechanical room after all the work you put into it (unless, that is, we determine before-and-after photos would work; then, hey, the debris is OK). That bag of chips and half-filled soda bottle… might be best to toss them, too. Also, do your very best to hold the camera level.
Learn to pre-focus your camera. Hold the shutter release (the button that activates picture-taking) half way down. The first time you try this you might snap a photo. No problem; just go back later and delete it. When you do this, the image on the screen will get clearer and stabilize if you’re camera has vibration reduction. When you’re satisfied, squeeze the button a little harder. Presto! Photographic history is made.
Learn to use your camera’s timer. If you are ever in the situation where you don’t want to leave anyone out of a shot, you will need to know how to use the timer. Most cameras have a setting that will allow you to set the camera down, focus it, hit the shutter button and go jump in the shot. Now that you’re in the shot, you can prove to your honey that you really do put in a day’s work!
Questions? Give us a call: 717-664-0535.